This One Step Will Change Your Lash Game


The one step I wish I started sooner. Click to see how I get longer, fuller lashes instantly.

Because longer, fuller lashes shouldn’t require 5 different products and a miracle.

✨ Affiliate Disclosure

This post may contain affiliate links. That means if you click and purchase, I may earn a small commission at no extra cost to you. I only recommend products I genuinely love and believe will add value to your beauty routine.

If you’ve ever spent 15 minutes layering mascara, curling (and re-curling) your lashes, only to have them fall flat by noon you’re not alone.

I used to think better lashes meant better mascara.

It doesn’t.

The real game-changer? Lash primer.

Yes that one simple step most people skip.

Why Lash Primer Is the Secret Weapon

Think of lash primer like a base coat for your nails or a face primer under foundation. It:

Adds instant length Creates thickness before mascara Helps mascara grip and last longer Prevents clumping Reduces flaking and smudging

The result? Lashes that look fuller, longer, and lifted all day without piling on heavy mascara.

My Go-To Lash Primer

If you’re new to primers, I highly recommend starting with L’Oréal Paris Voluminous Lash Primer.

👉🏻 https://amzn.to/47pjOVX

Why I love it:

Lightweight formula Conditions lashes over time Makes even drugstore mascara look high-end Noticeably boosts volume

Apply one thin coat, let it sit for about 20–30 seconds (not fully dry), then apply your mascara right over it.

The difference is immediate.

Pair It With the Right Mascara

Primer works with almost any mascara, but it truly shines when paired with something volumizing like:

💫 Too Faced Better Than Sex Mascara

👉🏻 https://amzn.to/470wdzN

💫 Maybelline Lash Sensational Mascara

👉🏻 https://amzn.to/46CgjeK

Even your everyday mascara will look dramatically better.

Pro Tips for Maximum Lash Drama

✔ Curl your lashes before applying primer

✔ Use a thin coat more is not better

✔ Wiggle the mascara wand at the base for lift

✔ Focus extra product on outer corners for a lifted effect

What Changes After You Start Using Primer

Here’s what most people notice:

Mascara looks more expensive Less layering needed Lashes stay lifted longer Fewer smudges under the eyes

It’s one small step but it completely upgrades your lash routine.

Final Thoughts

If you’ve been chasing better lashes by switching mascaras over and over try switching your technique instead.

Add primer.

It’s the one step that turns “nice lashes” into “wait, are those extensions?”

And once you start using it, you won’t skip it again.

Short Lashes to Sky-High Volume: Step-By-Step Mascara Guide (Before & After)

Transform short lashes into sky-high volume with this step-by-step mascara guide. See the before & after results, product tips, and application secrets for longer, fuller lashes.

Affiliate Disclosure

This post may contain affiliate links. That means I may earn a small commission if you purchase through my links, at no extra cost to you. I only recommend products I genuinely love and would use myself.

Short Lashes to Sky-High Volume ✨

If you’ve ever looked in the mirror and thought your lashes disappear without mascara… you’re not alone.

Short lashes can feel frustrating but the right technique (and the right mascara) can completely transform them.

Today, I’m sharing exactly how I go from bare, short lashes to sky-high volume in just a few simple steps.

And yes the before & after difference is dramatic.

Before: The Reality of Short Lashes

Without mascara:

Lashes can look sparse They may point straight out or downward Eyes appear smaller Makeup looks unfinished

Short lashes aren’t the problem the application technique usually is.

Let’s fix that.

Step-By-Step Guide: From Short to Sky-High Volume

Step 1: Start With Clean, Dry Lashes

Make sure there’s:

No leftover mascara No oil from skincare No powder fallout

Oil prevents mascara from gripping properly.

Step 2: Curl (Don’t Skip This!)

This is the game changer.

Use a quality lash curler and:

Clamp at the base for 8–10 seconds Move slightly upward and clamp again Create a soft lift not a harsh bend

👉 Pro tip: Warm your curler slightly with a blow dryer (test temperature first!).

Step 3: Apply a Lash Primer (Optional but Powerful)

If you struggle with:

Very short lashes Straight lashes Mascara smudging

A primer adds length and grip.

Great options to consider:

L’Oréal Voluminous Lash Paradise Primer

👉🏻 https://amzn.to/3NfkFSk

(drugstore favorite) Lancôme Cils Booster XL (high-end lift + conditioning)

👉🏻 https://amzn.to/4cZEZSb

Step 4: The Wiggle & Lift Technique

This is where the magic happens.

Place the wand at the base of your lashes Wiggle side to side Slowly pull upward Focus extra product at the roots

This builds volume at the base, making lashes look instantly fuller.

Step 5: Build in Thin Layers

Instead of one heavy coat:

Apply a thin first coat Let it get slightly tacky (15–20 seconds) Apply a second coat focusing on the tips

Avoid pumping the wand it adds air and dries out mascara.

Step 6: Focus on Outer Corners

Adding extra mascara to outer lashes:

Creates a lifted effect Makes eyes look wider Adds a soft glam look

Use the tip of the wand for precision.

After: Sky-High Volume Results

With proper technique:

Lashes look longer Volume appears doubled Eyes look brighter No extensions needed

The difference is dramatic and it only takes 5 minutes.

Best Mascaras for Short Lashes

Here are some top-rated options that work beautifully for volume + length:

💖 Drugstore Favorites

Maybelline Sky High Mascara L’Oréal Lash Paradise Essence Lash Princess False Lash Effect

👉🏻 https://amzn.to/4ucP44C

👉🏻 https://amzn.to/3Nd4cy4

👉🏻 https://amzn.to/4u5VjqJ

💎 High-End Options

Too Faced Better Than Sex Benefit They’re Real! Lancôme Monsieur Big

👉🏻 https://amzn.to/40Eyehd

👉🏻 https://amzn.to/4bqIDSX

Common Mascara Mistakes That Make Lashes Look Shorter

❌ Skipping lash curling

❌ Applying too much at once

❌ Not coating the base

❌ Using old, dried-out mascara

❌ Ignoring lower lashes completely

How to Make Mascara Last All Day

Set under-eyes lightly with powder Use waterproof formula if oily Avoid touching lashes Don’t apply heavy eye cream right before mascara

Frequently Asked Questions

How many coats of mascara should I apply?

2–3 thin coats are better than one thick coat.

Is waterproof mascara better for short lashes?

It holds curl better, but can be drying. Use occasionally.

Can mascara actually lengthen lashes?

Mascara coats and extends the tips especially fiber formulas giving the appearance of length.

Final Thoughts

Short lashes don’t mean you need extensions.

With the right technique and mascara, you can go from barely-there lashes to sky-high volume in minutes.

If you found this helpful, save it to Pinterest for later 💕

And if you try this technique let me know your results!

Before & After: What Lash Primer Really Does

Affiliate Disclosure: This post may contain affiliate links. This means I may earn a small commission if you purchase through my links at no extra cost to you. I only recommend products I genuinely love and use.

If you’ve ever wondered whether lash primer is just an extra step you don’t need or a secret weapon for bigger lashes you’re not alone. Mascara gets all the glory, but lash primer is the quiet overachiever in many makeup routines.

So what does lash primer really do? And is it worth adding to your routine?

Let’s break down the before and after.

What Is Lash Primer?

Lash primer is a base coat you apply before mascara. It’s designed to:

Add length Build volume Improve curl hold Prevent clumping Extend mascara wear

Think of it like face primer but for your lashes.

BEFORE: Mascara Alone

When you apply mascara without primer, you may notice:

Slight length and volume Potential clumping with extra coats Smudging or flaking by the end of the day Lashes losing curl over time

Mascara alone can look great but it’s limited by your natural lash density and structure.

AFTER: Mascara + Lash Primer

Here’s where the difference becomes noticeable.

1. Longer-Looking Lashes

Primer coats each lash from root to tip, creating a thicker base. When mascara goes on top, it grips onto that base instantly adding visible length.

2. Fuller Volume

Most primers contain lightweight fibers or conditioning waxes that expand the lash diameter before mascara even touches them.

3. Better Separation

Because primer defines each lash first, mascara applies more evenly reducing spider lashes and clumps.

4. Longer Wear

Primer helps mascara adhere better, meaning less flaking, less smudging, and longer-lasting results.

5. Healthier-Looking Lashes

Many formulas contain conditioning ingredients like vitamin E or peptides to help protect lashes over time.

Who Should Use Lash Primer?

Lash primer is especially helpful if you:

Have short or sparse lashes Struggle with smudging mascara Want a more dramatic look without falsies Have straight lashes that won’t hold curl

If you’re already layering multiple coats of mascara, primer may actually simplify your routine.

Popular Lash Primers Worth Trying

Here are a few highly rated options:

Lancôme Cils Booster XL – A cult favorite for dramatic length and volume.

👉🏻 https://amzn.to/4aKWLar

L’Oréal Voluminous Lash Paradise Primer – A budget-friendly option that pairs beautifully with its matching mascara.

👉🏻 https://amzn.to/4u06xgt

Dior Diorshow Maximizer 3D – Known for conditioning benefits and luxury performance.

👉🏻 https://amzn.to/4l1LEND

How to Apply Lash Primer (The Right Way)

Curl lashes first. Apply one thin coat of primer from root to tip. Let it set for 15–30 seconds (slightly tacky, not fully dry). Apply mascara directly on top.

Pro tip: Don’t wait too long mascara blends best while primer is still slightly wet.

Is Lash Primer Worth It?

If you love a natural one-coat mascara look, you may not need it.

But if you want:

Extra drama Longer wear Fuller-looking lashes Less clumping

Then yes lash primer can absolutely make a visible difference.

The “after” is subtle but noticeable, especially in photos and long-wear situations.

Final Thoughts

Lash primer isn’t mandatory but it’s one of those small upgrades that can elevate your entire makeup look.

It’s the difference between “nice lashes” and “wow, what mascara are you wearing?”

If you’re building a beauty routine that enhances what you already have (without extensions or falsies), this might be your next favorite step.

The Lash Primer Trick Makeup Artists Swear By

Want longer, thicker, clump-free lashes without extensions? There’s one simple step makeup artists always use and most people skip it.

The secret? Lash primer.

If you’ve ever wondered how celebrity lashes look so full and separated (even before falsies), this is the trick behind the magic.

Affiliate Disclosure

This post may contain affiliate links. That means I may earn a small commission if you purchase through my links at no extra cost to you. I only recommend products I genuinely love and believe will add value to you.

What Is Lash Primer?

Lash primer is a base coat applied before mascara. Think of it like face primer but for your lashes.

It:

Adds length and thickness Prevents clumping Boosts mascara color payoff Improves wear time Conditions lashes

Many primers are infused with ingredients like vitamin E, panthenol, or peptides to help strengthen lashes over time.

The Lash Primer Trick Makeup Artists Swear By

Here’s the exact trick pros use:

1️⃣ Apply Primer Generously

Coat lashes from root to tip, wiggling the wand to separate. Don’t be shy this is where volume builds.

2️⃣ Don’t Let It Fully Dry

This is the part most people get wrong.

Apply mascara while the primer is still slightly tacky.

This allows the mascara to grip onto the primer fibers, creating:

Dramatic volume Extreme length Zero flakes

3️⃣ Use a Volumizing Mascara on Top

For a bold finish, layer with a volumizing formula like:

L’Oréal Voluminous Lash Paradise

👉🏻 https://amzn.to/4aHLSWS

Dior Diorshow Mascara

👉🏻 https://amzn.to/4u8yfrw

The combination creates a false-lash effect without falsies.

Why Your Mascara Isn’t Performing

If your mascara:

Smudges Clumps Falls flat Doesn’t hold curl

You’re likely missing a primer.

Primer creates grip and structure, especially for:

Short lashes Straight lashes Sparse lashes Oily lids

Best Lash Primers to Try

Here are makeup artist favorites:

💎 High-End Pick

Lancôme Cils Booster XL

Lengthens instantly White formula intensifies black mascara Conditioning ingredients

👉🏻 https://amzn.to/4rJCzLV

💰 Budget-Friendly Pick

L’Oréal Voluminous Lash Primer

Adds noticeable thickness Works beautifully with Lash Paradise Affordable and easy to find

👉🏻 https://amzn.to/40Bmo7s

Pro Tips for Maximum Lash Drama

✔ Curl lashes before applying primer

✔ Use a clean spoolie to separate before mascara dries

✔ Apply a second coat only at the tips for extra length

✔ Avoid pumping your mascara wand (it causes clumps)

Is Lash Primer Worth It?

If you want:

Fuller lashes Longer wear time Less clumping A more dramatic look

Then yes absolutely.

It’s one extra step that makes a huge difference.

Final Thoughts

The lash primer trick isn’t complicated it’s just often overlooked.

Next time you do your makeup, try applying mascara before the primer fully dries. You’ll instantly see why makeup artists swear by this technique.

Your lashes will look:

Thicker Longer More lifted More expensive

And the best part? No extensions required.

Fix Droopy Lashes That Won’t Hold a Curl

If your lashes look amazing for five minutes… and then fall flat, you’re not alone. Stubborn, straight, or downward-growing lashes can refuse to hold a curl no matter how good your mascara is.

The good news? Droopy lashes are usually fixable with the right tools and technique.

Let’s break down why lashes won’t hold a curl and exactly how to fix them for all-day lift.

Why Your Lashes Won’t Stay Curled

Before fixing the issue, it helps to understand the cause:

Naturally straight or downward-growing lashes Heavy or wet mascara formulas Old or low-quality lash curlers Skipping waterproof formulas Humidity or oily eyelids Using conditioner-heavy mascaras

Think of your lashes like hair moisture and weight pull the curl out.

Step-by-Step: How to Make Lashes Hold a Curl

1. Start With Clean, Dry Lashes

Any oil, leftover skincare, or old mascara will prevent a curl from holding.

Lightly dust translucent powder over lashes if they’re oily.

2. Upgrade Your Eyelash Curler

Not all curlers are created equal. A high-quality curler makes a huge difference.

Top picks:

Shiseido Eyelash Curler – Great for almond & round eyes 👉🏻 https://amzn.to/3MWkPxU

Surratt Relevée Lash Curler – Ideal for flatter eye shapes 👉🏻 https://amzn.to/3ORwJcS

Tweezerman ProCurl Lash Curler – Budget-friendly option 👉🏻 https://amzn.to/3MUPlIk

Pro Tip: Replace the rubber pad every 2–3 months.

3. Warm the Curler (Game-Changer!)

Heat helps set the curl just like a curling iron.

Blast your curler with a hair dryer for 3–5 seconds. Test on your wrist first (never too hot!). Curl at the base, then gently “pulse” upward.

This alone can double curl longevity.

4. Use Waterproof Mascara (Even as a Top Coat)

Waterproof formulas lock in curl because they’re less water-based.

Best curl-holding mascaras:

Maybelline Lash Sensational Waterproof Mascara 👉🏻 https://amzn.to/4cUOLVD

L’Oréal Voluminous Lash Paradise Waterproof

👉🏻 https://amzn.to/4sCbj2j

Lancôme Monsieur Big Waterproof Mascara

👉🏻 https://amzn.to/477R9Vl

Hack:

Use your regular mascara first, then apply a thin coat of waterproof on top to “seal” the curl.

5. Try the “Double Curl” Method

Curl bare lashes. Apply one light coat of mascara. Let it get slightly tacky (about 10 seconds). Gently curl again at the base only.

Be very gentle no pumping.

6. Switch to a Lash Primer

A lightweight primer adds structure without heaviness.

Look for:

L’Oréal Voluminous Lash Primer Dior Diorshow Maximizer 3D

👉🏻 https://amzn.to/4r543uv

Avoid overly conditioning formulas if your lashes drop easily.

7. Consider a Heated Lash Curler

Heated curlers hold curl longer especially for stubborn lashes.

Popular options:

Panasonic Heated Eyelash Curler Grande Cosmetics GrandeLASH-LIFT Heated Lash Curler

They’re safer than they sound and excellent for touch-ups.

What NOT to Do

❌ Apply mascara before curling (unless doing double curl carefully) ❌ Pump your curler ❌ Use thick, wet mascara coats ❌ Skip replacing curler pads ❌ Curl aggressively this weakens lashes

If Nothing Works…

Some lashes are extremely resistant. In that case:

Consider a professional lash lift (lasts 6–8 weeks) Or use a high-quality lash perm kit at home (carefully)

Lash lifts reshape your natural lash pattern no daily curling needed.

Quick Fix Cheat Sheet

If you only remember three things:

Use a high-quality curler Warm it slightly Seal with waterproof mascara

That’s the winning combo for most people.

Final Thoughts

Droopy lashes aren’t a mascara problem they’re usually a technique or tool problem. Once you adjust your method, you’ll notice a major difference in lift and longevity.

With the right approach, even the straightest lashes can stay curled all day.

Affiliate Disclosure

This post may contain affiliate links. That means if you purchase through these links, I may earn a small commission at no extra cost to you. I only recommend products I genuinely trust and believe will provide value. Thank you for supporting this blog!

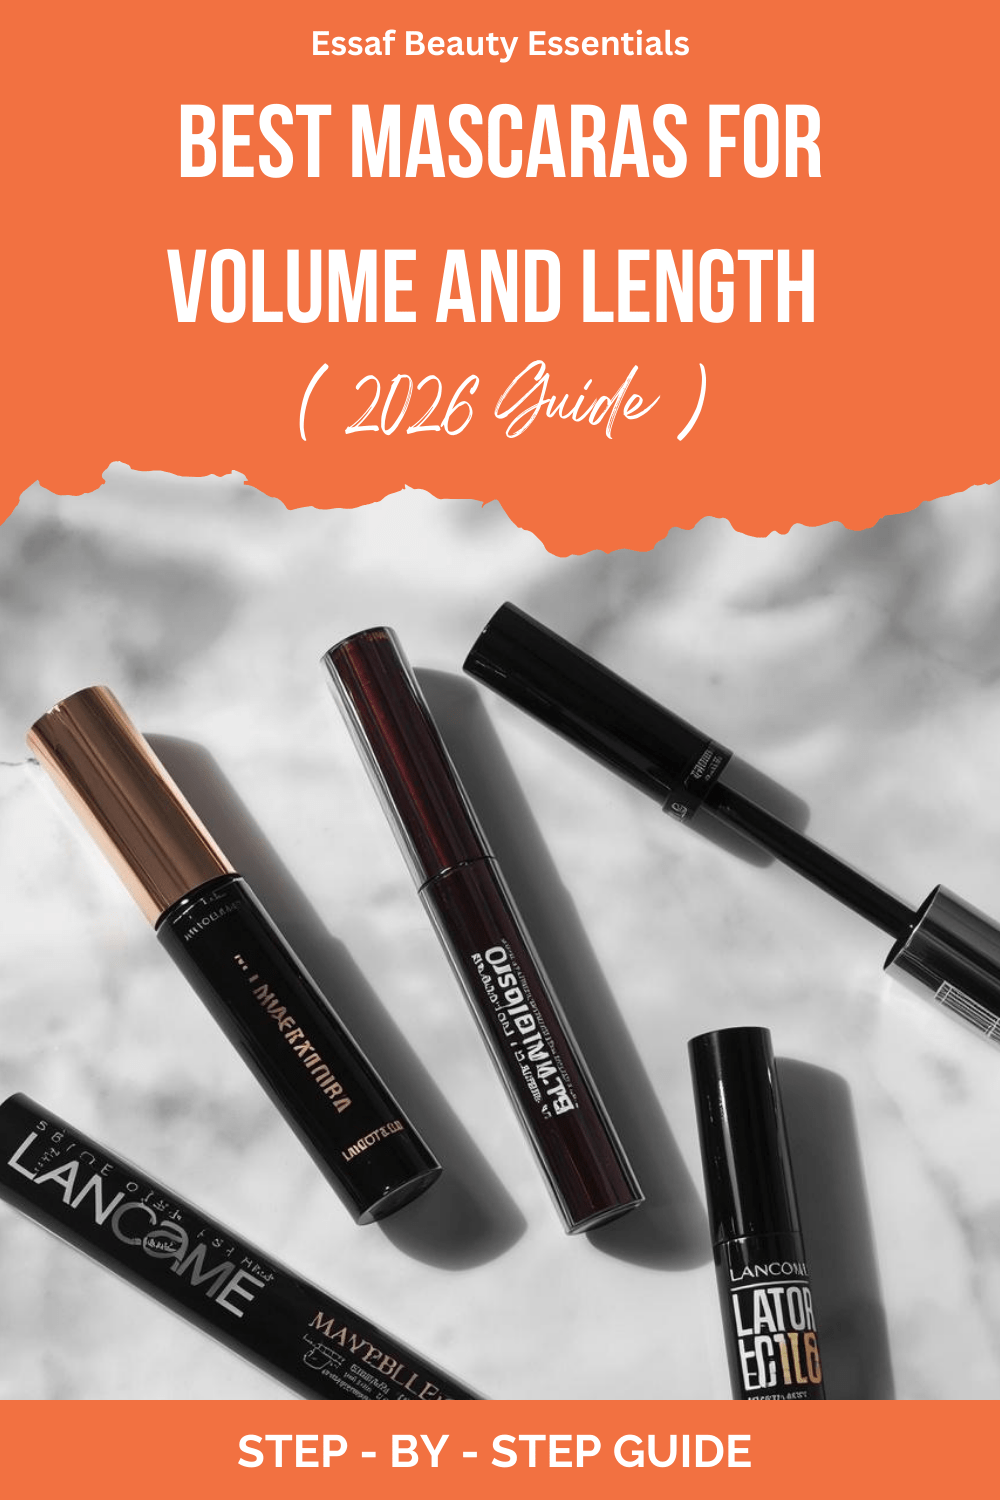
💄 Best Mascara for Volume and Length (2026 Guide)

Long, full, dramatic lashes never go out of style and in 2026, mascara formulas are better than ever. Whether you want bold glam lashes or soft everyday volume, this guide covers the best mascaras for both volume and length to help you find your perfect match.

This post contains affiliate links. As an Amazon Associate, I earn from qualifying purchases. This comes at no extra cost to you and helps support this blog.

✨ What to Look for in a Volume + Length Mascara

Before we jump into the top picks, here’s what makes a mascara truly stand out:

Buildable Formula – Layers without clumping Lengthening Fibers – Adds visible extension Volumizing Waxes – Thickens each lash Long-Wear Hold – No flaking or smudging Brush Design – Big fluffy wands for volume, tapered for length

Now let’s get into the best of 2026.

1. 👑 Too Faced Better Than Sex Mascara

Best Overall for Dramatic Volume

This cult favorite continues to dominate beauty shelves in 2026. The hourglass-shaped brush grabs every lash while the collagen-infused formula creates intense volume.

👉🏻 https://amzn.to/4l0uVu1

Why You’ll Love It:

Thick, bold volume Deep black pigment Great for glam makeup looks

Best For: Night out, events, bold eye looks

Finish: Dramatic & full

2. 🌸 L’Oréal Paris Lash Paradise Mascara

Best Drugstore Option

A budget-friendly favorite that rivals high-end mascaras. It adds both noticeable volume and length without breaking the bank.

👉🏻 https://amzn.to/4cYDELg

Why You’ll Love It:

Soft, feathery lashes Buildable without clumps Affordable and widely available

Best For: Everyday wear

Finish: Soft glam

3. 💎 Maybelline Lash Sensational Sky High Mascara

Best for Extreme Length

If length is your top priority, this one delivers. The flexible brush reaches even the tiniest lashes for a sky-high effect.

👉🏻 https://amzn.to/4cdYgit

Why You’ll Love It:

Incredible length boost Lightweight formula Great separation

Best For: Straight or short lashes

Finish: Long & defined

4. 🔥 Benefit Cosmetics They’re Real! Mascara

Best for Lift & Curl

This mascara gives a lifted, fanned-out lash look that makes eyes appear bigger.

👉🏻 https://amzn.to/46yQVX3

Why You’ll Love It:

Strong curl hold Lengthens visibly Long-wearing formula

Best For: Hooded or smaller eyes

Finish: Lifted & separated

5. 🌿 ILIA Limitless Lash Mascara

Best Clean Beauty Pick

Perfect if you prefer a cleaner formula without sacrificing performance.

👉🏻 https://amzn.to/3MTsRHG

Why You’ll Love It:

Dual-sided brush Lengthens and separates Gentle formula for sensitive eyes

Best For: Natural makeup lovers

Finish: Defined & fluttery

💡 Pro Tips for Maximum Volume + Length

Wiggle the wand at the base before sweeping upward. Apply 2–3 thin coats instead of one thick layer. Use a lash curler beforehand for extra lift. Let the first coat get slightly tacky before adding another.

🛍️ Final Thoughts

The best mascara ultimately depends on your lash type and desired look. For bold drama, go with Too Faced. For everyday beauty on a budget, L’Oréal Lash Paradise is a winner. And if length is your main goal, Maybelline Sky High delivers stunning results.

No matter which you choose, 2026 is all about big, defined, fluttery lashes.

If you found this guide helpful, share it with a friend who’s always on the hunt for the perfect mascara 💕

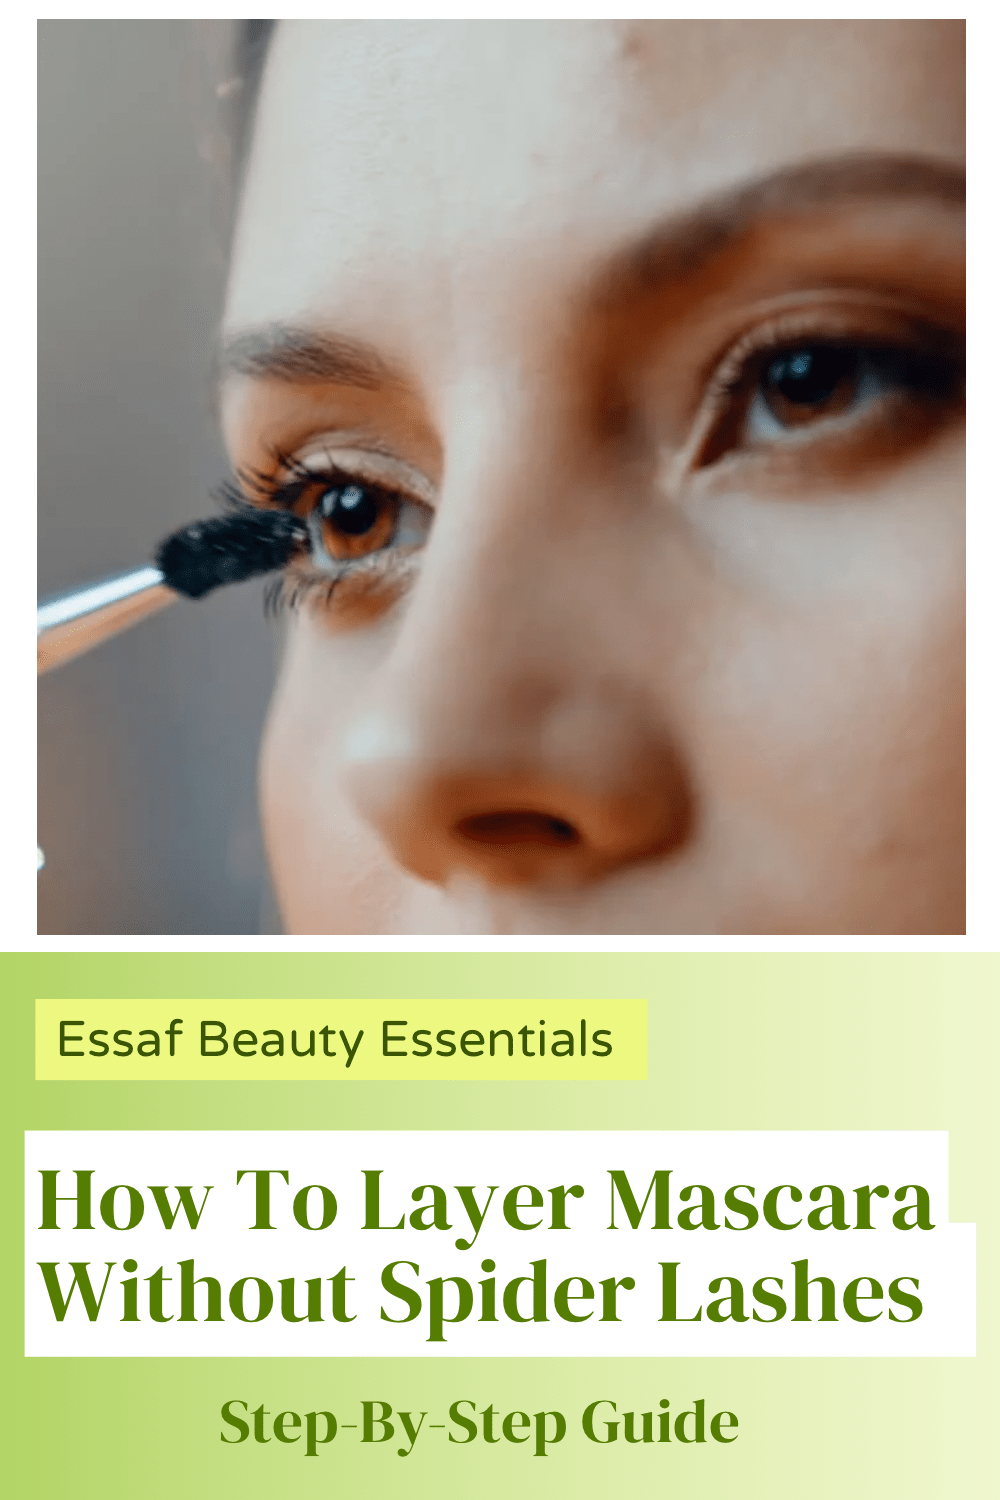
How To Layer Mascara Without Spider Lashes (Step-By-Step Guide)


Learn how to layer mascara without spider lashes using this easy step-by-step guide. Get longer, fuller lashes without clumps or flaking.

Essaf Beauty Essentials

There’s nothing more frustrating than trying to build volume with mascara , only to end up with thick, clumpy “spider lashes.”

The good news? Layering mascara correctly can give you long, separated, fuller lashes without the mess.

In this guide, I’ll walk you through exactly how to layer mascara the right way so you get dramatic results while keeping your lashes soft and defined.

Why Do Spider Lashes Happen?

Spider lashes usually happen because of:

Applying too many coats too quickly Using a formula that’s too wet or too thick Not separating lashes between coats Letting mascara dry completely before layering Pumping the wand (which adds excess product)

The key to avoiding this is controlled layering and proper technique.

Step-By-Step: How To Layer Mascara Without Clumping

Step 1: Start With Clean, Dry Lashes

Make sure your lashes are completely clean and free of old mascara.

If your lashes are oily, lightly dust translucent powder over them. This helps mascara grip better and last longer.

Step 2: Curl Your Lashes First

Always curl before applying mascara never after.

Hold your lash curler at the base for 5–10 seconds, then gently pulse upward for a natural lift. This prevents the need for heavy layering later.

👉🏻 https://amzn.to/4rL7uI2

Step 3: Apply a Thin First Coat (Length Focus)

For the first coat:

Wipe excess mascara off the wand Wiggle at the base Slowly pull upward Focus on separation, not volume

This coat acts as your foundation.

Pro Tip: Use a lengthening mascara for your first layer.

👉🏻 https://amzn.to/4aRRufN

Step 4: Let It Get Tacky Not Dry

Wait about 20–30 seconds before applying the second coat.

If you wait too long and it dries completely, the next layer will clump.

The sweet spot? When lashes feel slightly tacky.

Step 5: Second Coat for Volume

Now you can build thickness.

Use lighter pressure Focus on the outer corners for lift Avoid dragging through the tips repeatedly

If you want more drama, apply a third very light coat only at the base.

Step 6: Separate Immediately

Before the mascara dries:

Use a clean spoolie ( https://amzn.to/4cgKITq ) Or a metal lash comb ( https://amzn.to/4772xAH)

Gently comb through to remove clumps

This step is what prevents spider lashes.

Bonus Tips for Clump-Free Lashes

✔ Don’t pump the wand

✔ Replace mascara every 3 months

✔ Avoid thickening formulas if you struggle with clumping

✔ Use waterproof only as a final light layer

✔ Less product = better control

Best Types of Mascara for Layering

Look for formulas labeled:

Buildable Lengthening Lightweight Defining

Avoid ultra-thick fiber-heavy formulas if you’re layering multiple coats.

Common Layering Mistakes

Applying 3–4 heavy coats at once

Instead, build slowly with thin layers.

Skipping separation

A clean spoolie makes a huge difference.

Using old mascara

Dry formulas clump instantly.

💄 Recommended Products for Clump-Free Lashes

💫 Best Lash Curler ( https://amzn.to/40vDpjo )

💫 Best Lengthening Mascara ( https://amzn.to/4qZwWrQ )

💫 Best Volumizing Mascara ( https://amzn.to/4baJRma )

💫 Best Lash Comb ( https://amzn.to/3ONkGgG )

Final Thoughts

Layering mascara is all about control and timing.

When you apply thin coats, wait for tackiness (not dryness), and separate properly, you’ll get long, fluttery lashes instead of spider legs.

With a little practice, you can build natural definition for daytime or bold glam for night without ever dealing with clumps again.

Frequently Asked Questions

How many coats of mascara is too many?

Usually more than three coats starts to look heavy. Two thin layers are ideal for everyday wear.

Why does my mascara always clump on the second coat?

You’re likely waiting too long between coats or applying too much product.

Can you mix two different mascaras?

Yes! Try using a lengthening formula first and a volumizing formula second.

Affiliate Disclosure

This post may contain affiliate links. This means if you click on a link and make a purchase, I may earn a small commission at no extra cost to you. I only recommend products I genuinely believe in and that align with Essaf Beauty Essentials’ standards. Your support helps keep this content free and helpful thank you!

Does Lash Primer Help Mascara Last Longer? (Step-by-Step Guide)

Featured Image: Close-up of lashes with primer application

Beautiful, long-lasting lashes are the goal every time we apply mascara. But if you’ve ever dealt with smudging, flaking, or lashes that fall flat by noon, you might be wondering:

Does lash primer really help mascara last longer?

The short answer? Yes when used correctly, lash primer can significantly improve the wear, volume, and overall look of your mascara.

Let’s break down exactly how it works and how to use it properly.

What Is Lash Primer?

Lash primer is a conditioning base coat applied before mascara. It’s designed to:

Add length and volume Help mascara adhere better Prevent smudging and flaking Improve overall mascara longevity

Most lash primers are white or translucent so you can see where you’ve applied them before layering mascara on top.

Does Lash Primer Actually Make Mascara Last Longer?

Yes and here’s why.

Lash primer creates a slightly tacky base that helps mascara grip onto your lashes. This improves:

Staying power – Less fading throughout the day Smudge resistance – Especially helpful for oily eyelids Flake reduction – Mascara holds better to conditioned lashes Curl retention – Lashes stay lifted longer

Think of it like face primer before foundation. It helps everything stay in place.

Who Benefits Most from Lash Primer?

Lash primer is especially helpful if you:

Have short or sparse lashes Struggle with mascara smudging Have oily eyelids Want extra volume without heavy layering Use non-waterproof mascara but need longer wear

If your mascara already lasts all day without issues, primer may not be essential but it can still enhance volume and drama.

Step-By-Step: How to Apply Lash Primer for Maximum Wear

Step 1: Start with Clean Lashes

Make sure there’s no leftover makeup or oil.

Step 2: Curl Your Lashes (Optional)

Curl before applying primer for best lift.

Step 3: Apply Lash Primer

Wiggle the wand from root to tip. Coat evenly but don’t overload.

Step 4: Let It Get Slightly Tacky

Wait about 15–30 seconds. Don’t let it dry completely.

Step 5: Apply Mascara Immediately

Apply your mascara directly over the primer before it fully dries.

💡 Pro Tip: If primer dries too much, lashes can look clumpy.

Best Types of Lash Primers to Look For

When choosing a lash primer, look for:

Conditioning ingredients (like panthenol or vitamin E) Lightweight formulas Clump-free wands Quick-drying texture

Some popular options many beauty lovers swear by include:

L’Oréal Voluminous Lash Paradise Primer Lancôme Cils Booster XL Essence Volume Booster Lash Primer

👉🏻 https://amzn.to/4kWUc8G

👉🏻 https://amzn.to/4sgw6rX

(Always choose one that suits your budget and lash needs.)

Are There Any Downsides?

While lash primer is generally beneficial, there are a few things to keep in mind:

Applying too much can cause clumping Some formulas may feel heavy Adds an extra step to your routine

If you prefer a quick, low-maintenance makeup routine, you may skip it on everyday looks.

Final Verdict: Is Lash Primer Worth It?

If you want:

✔ Longer-lasting mascara

✔ More dramatic volume

✔ Less smudging

✔ Better lash definition

Then yes , lash primer is absolutely worth trying.

It’s especially helpful for long days, events, humid weather, or whenever you want your lashes to look their best from morning to night.

💕 My Favorite Lash Primer

If you want dramatic, long-lasting lashes, this is my go-to

💫 Shop Essence Volume Booster Lash Primer On Amazon

👉🏻 https://amzn.to/4cN4ki0

FAQs

Can you wear lash primer alone?

Some are conditioning enough to wear alone, but most are designed to be topped with mascara.

Does lash primer damage lashes?

No most formulas actually contain conditioning ingredients that protect lashes.

Is lash primer necessary with waterproof mascara?

Not necessary, but it can improve volume and prevent dryness.

Affiliate Disclosure

This post may contain affiliate links. This means if you click on a link and make a purchase, I may earn a small commission at no additional cost to you. I only recommend products I genuinely believe can add value to my readers. Thank you for supporting this blog!

Why Your Mascara Isn’t Working (And How to Fix It)

Let’s be honest , mascara should be the easiest step in your makeup routine. A few swipes and boom: longer, fuller, lifted lashes.

So why are yours clumpy, smudged, barely visible, or drooping by lunchtime?

If your mascara isn’t delivering, the problem usually isn’t your lashes it’s the formula, the wand, or your technique. Let’s break down what’s going wrong and exactly how to fix it.

💄 My Mascara Favorites

💫 Best for Volume (Too Faced Better Than Sex )

👉🏻https://amzn.to/4rE8EoD

💫 Best for Length (Maybelline Sky High)

👉🏻 https://amzn.to/3ZUtIuS

💫 Best for Separation (Benefit Roller Lash)

👉🏻 https://amzn.to/3MHi7wa

1. Your Mascara Is Too Old

Mascara has one of the shortest shelf lives in your makeup bag about 3 months.

Signs it’s expired:

Thick, dry texture Strong smell Clumping instantly Flaking throughout the day

When mascara dries out, it won’t coat lashes evenly. It’ll clump and crumble.

Fix:

Replace it every 3 months. If you want a reliable everyday formula, L’Oréal Lash Paradise gives great volume without drying out too quickly.

2. You’re Using the Wrong Formula for Your Lashes

Not all mascaras are created equal.

Short lashes? You need lengthening. Straight lashes? You need waterproof or curl-holding. Sparse lashes? You need volumizing. Sensitive eyes? You need tubing mascara.

For example, Maybelline Sky High Mascara is amazing for length, while Too Faced Better Than Sex focuses more on volume.

Fix:

Match the mascara to your lash type not what’s trending on TikTok.

3. You’re Not Curling Your Lashes First

Mascara is not a lash curler.

If your lashes point straight or downward, no mascara can magically lift them without help.

Fix:

Use a quality curler before applying mascara. The Shiseido Eyelash Curler is a cult favorite because it fits most eye shapes without pinching.

Pro tip: Heat the curler slightly with a hairdryer (test temperature first!) for longer hold.

4. You’re Applying Too Many Coats

More layers = more clumps.

Mascara should be applied in thin, quick layers, not slow heavy strokes.

Fix:

Wiggle the wand at the base Pull upward slowly Apply 1–2 coats max Let it get tacky before a second coat

If you want separation without clumps, Benefit Roller Lash is great for definition.

5. You’re Pumping the Wand

We’ve all done it. Pumping pushes air into the tube which dries out the formula faster.

Fix:

Instead of pumping, twist the wand gently inside the tube to pick up more product.

6. You Have Oily Lids (That’s Why It Smudges)

If your mascara transfers to your brow bone or under-eyes, oil is likely the culprit.

Fix:

Apply a light dusting of translucent powder under your eyes Use waterproof mascara on the top lashes only Try a tubing formula

Tubing mascaras like Thrive Causemetics Liquid Lash Extensions wrap each lash and resist smudging.

👉🏻 https://amzn.to/4aLbkJF

7. You’re Skipping Lash Prep

Your lashes need prep just like your skin does.

Fix:

Use a lash primer before mascara. A good one like Lancôme Cils Booster XL adds thickness and makes mascara grip better.

👉🏻 https://amzn.to/40s3wrt

Final Thoughts

If your mascara isn’t working, it’s usually an easy fix.

✔ Replace it regularly

✔ Match formula to your lashes

✔ Curl first

✔ Apply lightly

✔ Stop pumping

The right technique + the right product makes all the difference.

Affiliate Disclosure

This post may contain affiliate links. This means I may earn a small commission if you purchase through my links, at no extra cost to you. I only recommend products I genuinely believe in and think will benefit you.

✨ SLOWMOTION MASCARA APPLICATION: The Secret to Dramatic, Clump-Free Lashes


Watch how slowing down your technique creates fuller, longer, clump-free lashes. Wiggle at the base, lift with control, and build in light layers for the perfect finish. 👁️

There’s something hypnotic about watching mascara being applied in slow motion. Every stroke, every lift, every flutter it transforms bare lashes into bold, eye-catching drama. Today, we’re breaking down the art of slow-motion mascara application so you can recreate that flawless, cinematic lash look at home.

Whether you’re using a cult favorite like Maybelline Lash Sensational Sky High or a luxury pick like Too Faced Better Than Sex Mascara, technique makes all the difference.

👉🏻 https://amzn.to/4tROwAF

👉🏻 https://amzn.to/4aDFuyo

💄 Why Slow Motion Application Works

When you slow down your mascara routine, you:

✔ Coat every lash evenly ✔ Avoid clumps and spider lashes ✔ Build volume gradually ✔ Separate and lift for maximum drama

Think of it as precision glam instead of rushed swipes.

🎬 Step-by-Step: The Perfect Slow-Motion Mascara Routine

1️⃣ Start With a Clean Base

Remove any leftover makeup or oils. Clean lashes help mascara adhere better and last longer.

2️⃣ Curl (Optional, But Powerful)

Hold your lash curler at the base for 5–10 seconds. A gentle pump creates a natural lift that mascara enhances beautifully.

3️⃣ The Slow Wiggle Technique

This is the magic step:

Place the wand at the base of your lashes Wiggle side to side slowly Pull upward in one smooth motion Rotate the wand slightly as you lift

✨ The key is to move slowly enough to see each lash separate.

4️⃣ Build in Light Layers

Instead of one heavy coat, apply two thin coats. Let the first coat set for about 20–30 seconds before applying the second.

For extra length, focus the second coat on the outer corners for a soft cat-eye effect.

5️⃣ Define the Lower Lashes

Use the tip of the wand vertically and lightly tap upward. Slow motion control prevents smudging.

🌟 Pro Tips for Eye-Catching Results

Use a lash comb if needed Don’t pump the wand (it dries out mascara!) Replace mascara every 3 months For dramatic effect, pair with a bold liner like Stila Stay All Day Waterproof Liquid Eyeliner

👉🏻 https://amzn.to/3ZPGx9N

📸 Why Slow-Mo Mascara Is Trending

On platforms like TikTok and Instagram , slow-motion beauty videos highlight texture, volume, and technique. The visual satisfaction of watching lashes transform frame by frame makes it irresistible and incredibly shareable.

If you’re a beauty blogger, this is a high-engagement content idea for your WordPress site and social channels.

💰 Affiliate Disclosure

This post may contain affiliate links. That means if you click on a link and make a purchase, I may earn a small commission at no additional cost to you. I only recommend products I genuinely love and believe will add value to your beauty routine. Your support helps keep this blog running thank you!

💖 Final Thoughts

Mascara isn’t just makeup it’s transformation in motion. When you slow down and apply with intention, your lashes look fuller, longer, and undeniably eye-catching.

Design a site like this with WordPress.com
Get started